Can I Connect One Router to Another Without Cable?
If you want to connect one router to another router using a wireless mode then this post will help you make the connection. It is to be noticed that in order to connect one router to another without cable, the second router should support WDS or bridging or repeater mode. Confirm this first and then go for the connection. The instructions discussed ahead will help you with the connection.
Let’s Connect One Router to Another Without Cable
Ensure that the first router is configured already before you begin making the connection. Gather information about its SSID and WiFi password as you’ll need them while configuring the second router. Also, check that its DHCP server is enabled. Only one router should have the DHCP enabled. This will serve as the primary router which is responsible for assigning IP addresses to the connecting devices.
Use these steps:
- On a computer that’s connected to the router, log in to the router’s web interface using the IP address.
- Upon logging in, check the DHCP settings.
- Copy the IP address range from here.
- You might also need to router’s MAC address.
- If any changes are made, then save the settings.
It is now time you bridge the second router. Disconnect your computer from the first router’s network and connect it to the second router’s network. You can make a wireless connection by selecting its SSID, however we suggest opting for an Ethernet connection.
How to Configure Bridge Mode on Router?
- Insert the router’s IP address in the URL field of the browser. Press the Enter key.
- Insert the login password and have access to the admin portal.
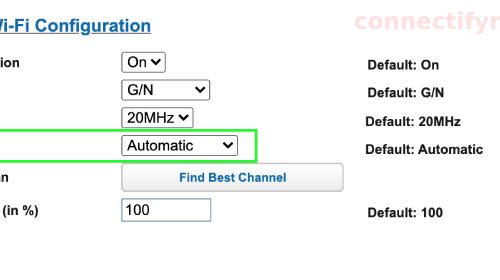
- In the Settings, go to Wireless.
- Enable WDS Bridging from the settings. In some routers, the option says Enable Repeater mode.
- For example, a Netgear router has settings like this: Advanced > Advanced Setup> Router/AP/Bridge/Repeating Mode. Select Enable Wireless Repeating and select Wireless Repeater.
- After that, insert the IP details that you gathered from the first router’s settings.
- Key in the SSID and WiFi password.
- In the Default Gateway field, type the first router’s IP address.
- Assign an IP to this router on the same subnet as the first router.
- Enter the MAC address if prompted.
- Next create a WiFi name and password for this router. The SSID value should be different from the other router. The password should remain the same as the first router.
- Ensure to turn off DHCP on this router.
- Save the settings once you’re done making the necessary changes.
This is all about how you can connect one router to another without cable. You can now place the router in some other part of the home and try connecting to its network.